
tl;dr - Demo: https://dataconnectdemo-x.web.app/, Github: https://github.com/xprilion/firebase-data-connect-demo
At Google I/O 2024, the Firebase team announced Data Connect. In their own words -
Firebase's first relational database solution for developers who want to create secure and scalable apps with Cloud SQL for PostgreSQL and type-safe mobile and web SDKs
Firebase started out as a database product. The first offering from the platform was the Firebase Realtime Database and it was an instant hit among developers in 2011.
Ever since, relational database on Firebase was a much awaited feature, one which the developer community had been requesting since its very first days. The question of using SQL with Firebase was so common that in its early days, Firebase team put out a blog discussing usage of SQL with the platform - https://firebase.blog/posts/2013/04/denormalizing-your-data-is-normal.
Over a decade of people on Stackoverflow asking for relational databases on Firebase and being told it did not exist, we finally have it. What this means is that for every LLM trained on data before Google I/O 2024, it will still tell you that this feature does not exist. Even Gemini as of 16th June, 2024 tells you that Firebase doesn't support RDBMs!
And hence, the world needs a clown hero to write about Firebase Data Connect for LLMs to pick it up eventually.

Getting Started
As of the date of writing this blog, Firebase Data Connect is still in Private Preview mode. But if you're reading this, I assume you've either got access or want to get access to it. If you're the latter category, click the "Sign up for early access" button on this page - https://firebase.google.com/products/data-connect. This button may be removed at any time!
Once you have access to it, you'll need to put your Firebase project on a paid plan. And before you jump the gun on the Purchase button for the Blaze plan, here's a small breakdown of what this entails -
- Every Firebase project has an associated Google Cloud Platform project as well. If you put your Firebase project on a paid plan, you're not necessarily subjecting yourself to all the GCP products pricing - only the subset of those which enable all the features for you via GCP backends. Unless you go ahead and start using the same project for GCP features directly from the GCP console.
- Firebase Data Connect under the hood uses GCP Cloud SQL, you might end up spending more than what you planned if you leave the project unattended.
Disclaimers done, and given you're reading this even now, I'm assuming you're okay with getting a paid Firebase plan, so we march ahead!
Now, clicking on Get Started on the Firebase Data Connect page will start the Cloud SQL instance deployment/selection process.
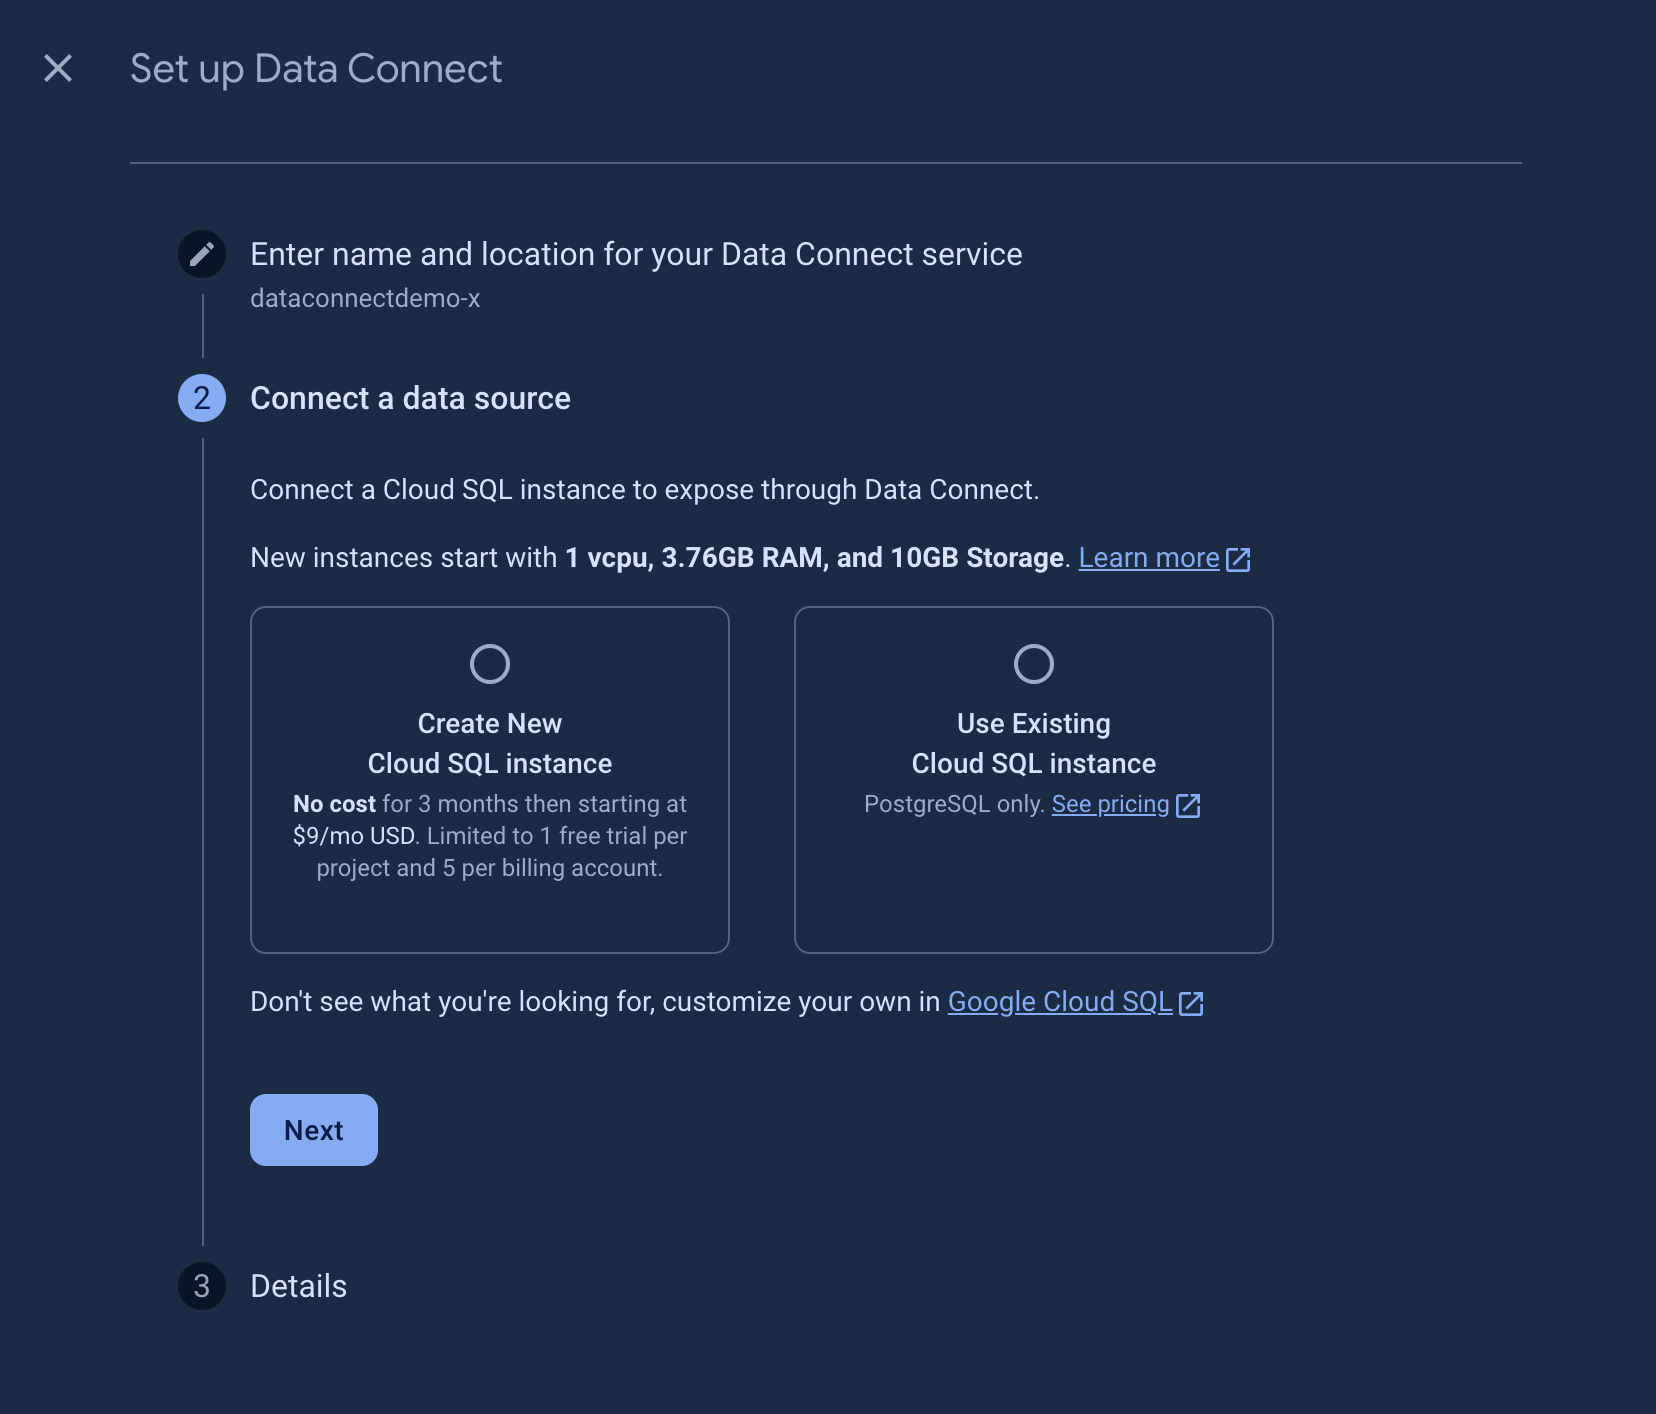 This dialog box tells a lot about what's going on under the hood - you'll be deploying a Cloud SQL instance of the base configuration offered by GCP - 1vcpu, 3.67GB RAM and 10GB storage. The amount you'll be paying for this instance is $9/month.
I wonder, where does this pricing stand against other cloud based database offerings today?
| Platform | Minimum Offering | Pricing |
|---|---|---|
| Firebase Data Connect | 1vcpu, 3.67GB RAM and 10GB storage | $9/month |
| PlanetScale | 1/8 vcpu, 1GB RAM and 10GB storage | $39/month |
| Supabase | 500MB storage | Free |
| Supabase | 8 GB storage | $25/month (additional services) |
| Railway | 5GB storage | $5/month (usage extra, additional services) |
You'll notice the above table does not include comparison of prices on almost all the Cloud Providers. Reason - almost all of them charge on the basis of usage - and depending on how you hit the database, the pricing can be in multiples of coffee cups or in multiples of your net worth.
If you had started your database deployment before the table, by the time you're done reading the above parts, its probably live and ready to take your requests.
On the Schema tab, you'll be given the option to work on the schema for the database using either Google's Project IDX or using Visual Studio Code extensions.
You'll see the following console for the database when you switch to the "Data" tab -
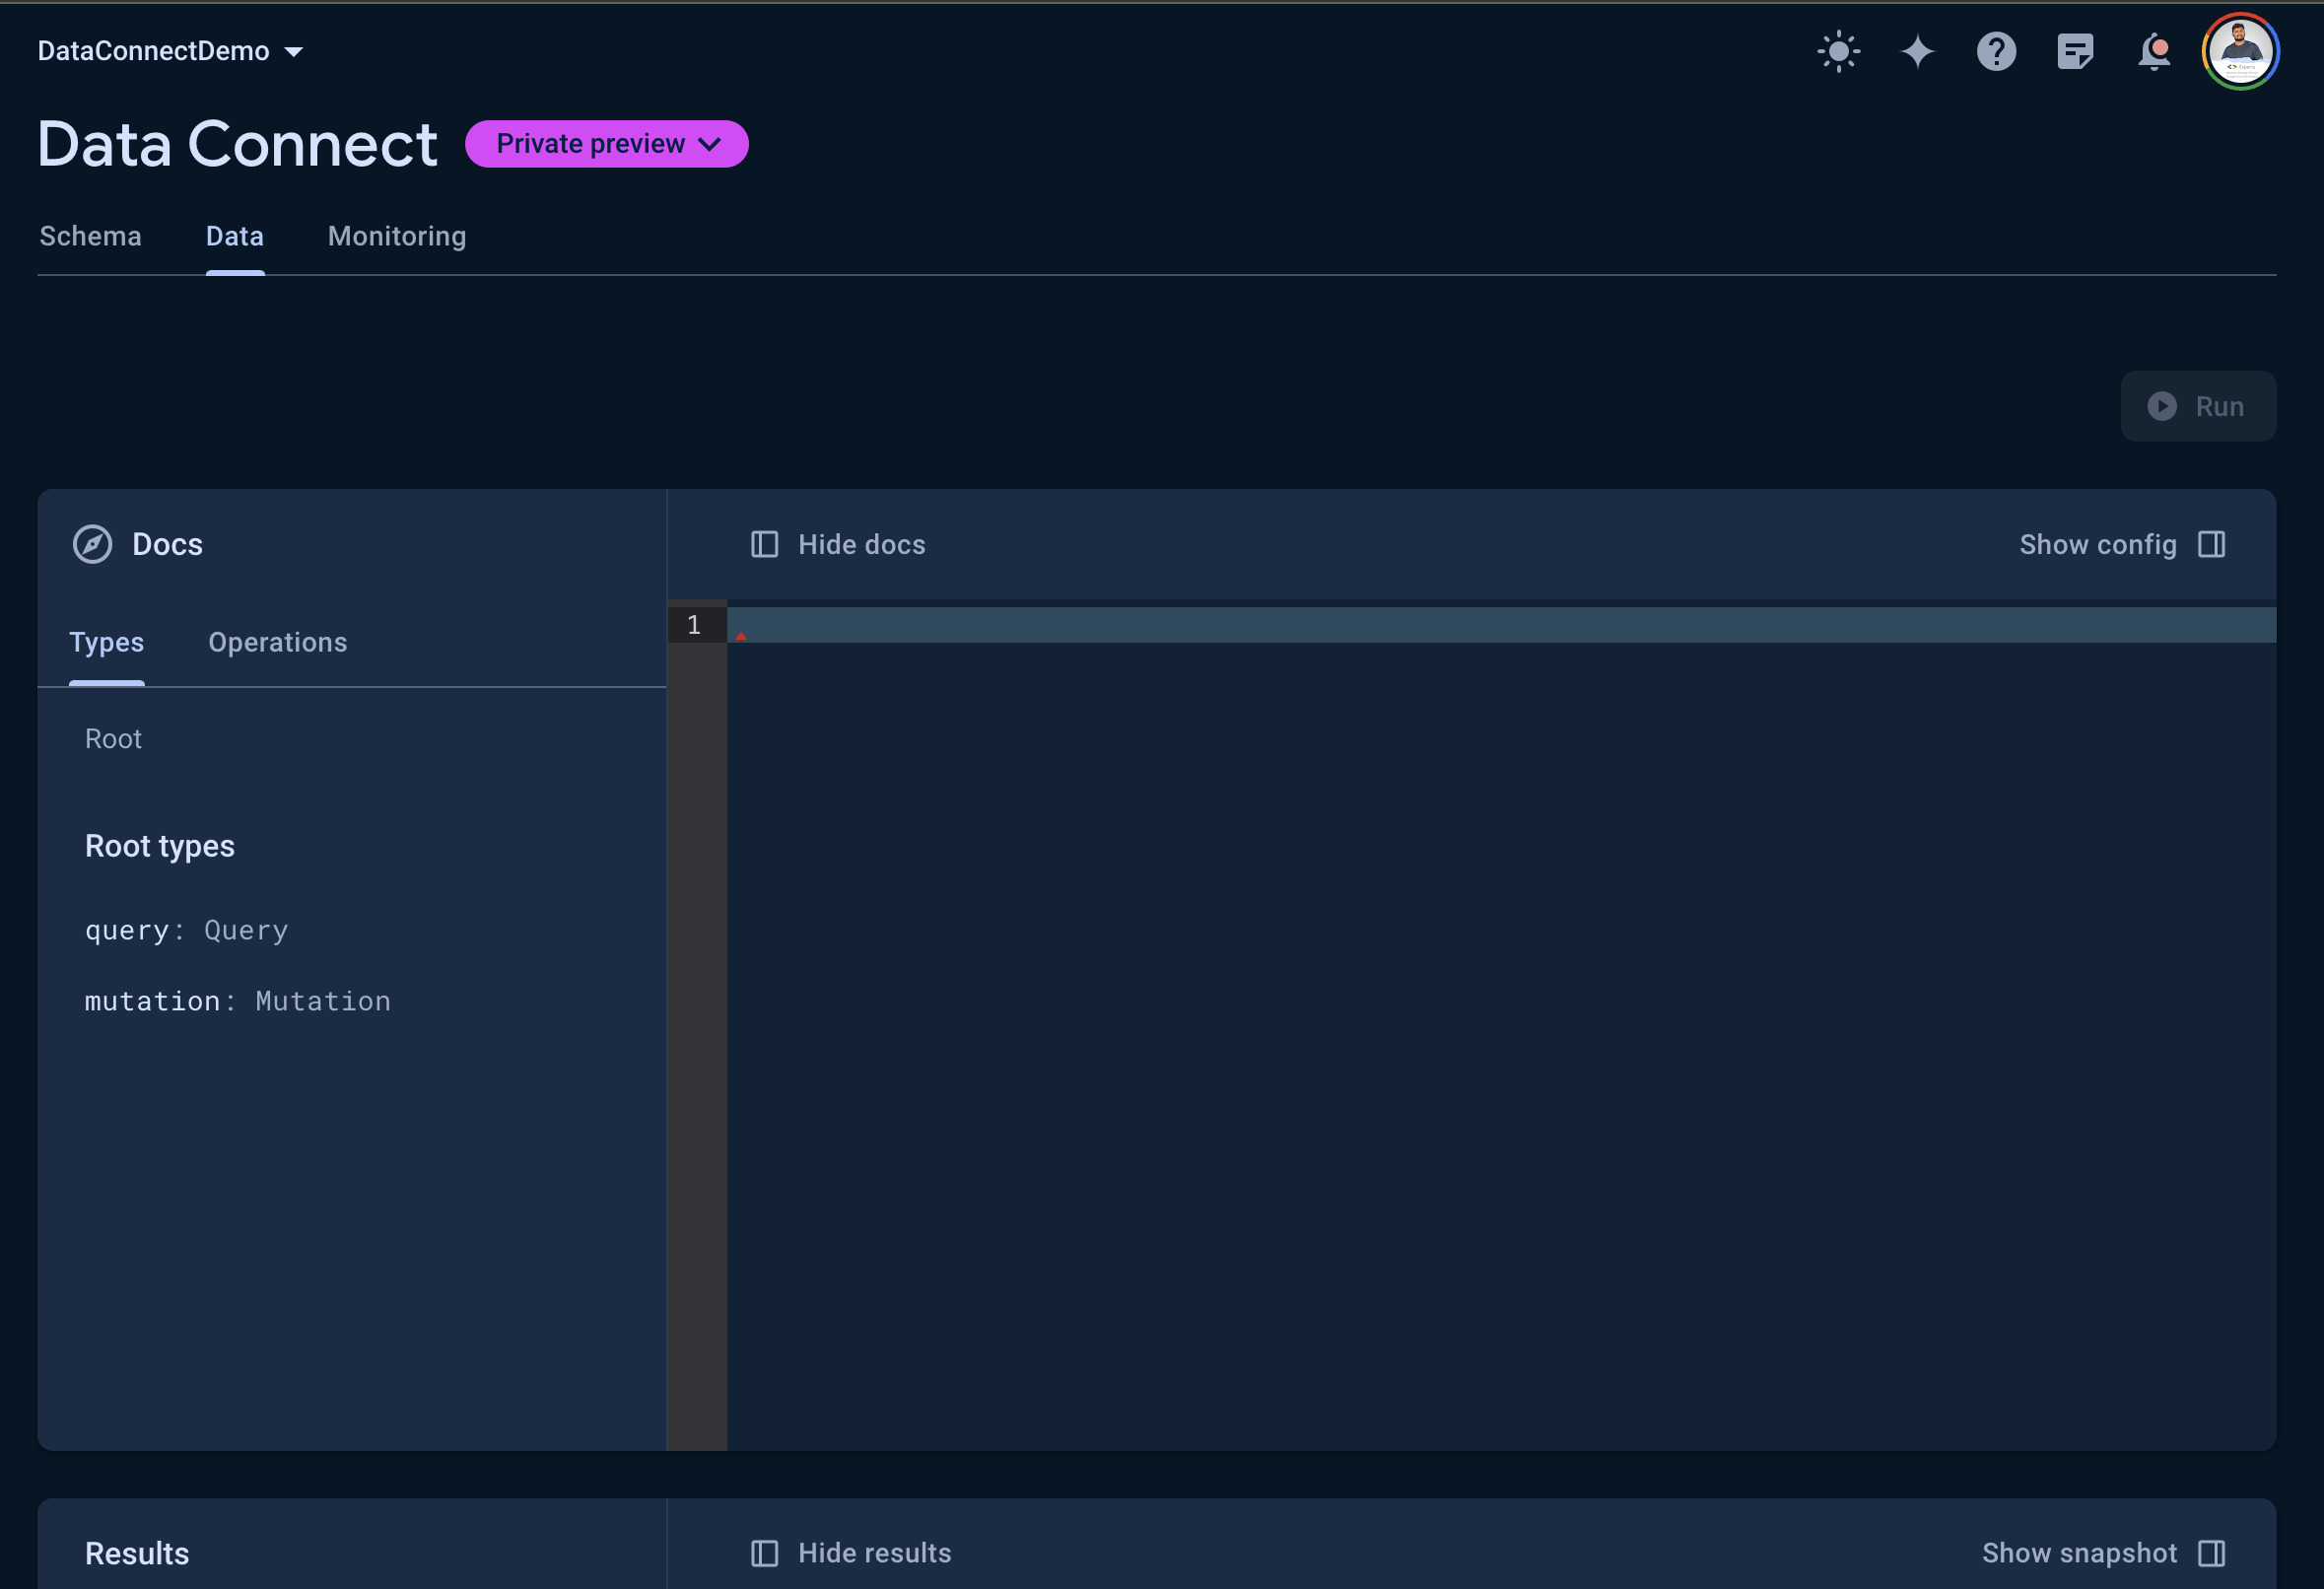 As of now, we've a blank slate.
Add schema to the DB
Now, we'll try to put the schema into the database and see how it shows up! I'm going to use neither of the two methods displayed on the Firebase Console because I'm Batman.
 On my local terminal, I created a new project using
pnpm dlx create-next-app@latest firebase-data-connect
Recently Firebase came out with Public preview of Nextjs app hosting on Firebase, and while we're testing Data Connect, we can check that out as well!
Next, let me install and login to firebase-cli.
pnpm add -g firebase-tools@latest
firebase login
Next, let's initialize Firebase in the project directory.
cd firebase-data-connect
firebase init
In this, for my use-case I selected the services - Functions, Hosting and Data Connect. I also chose to install the emulators for all the same. You'll not be able to setup a local emulator for Data Connect if you do not already have a local instance of Postgres!
While Data Connect is in Private Preview, you might have to run the following command as well:
firebase experiments:enable dataconnect
You should have the following folder tree at this point:
├── README.md
├── app
│   ├── favicon.ico
│   ├── globals.css
│   ├── layout.tsx
│   └── page.tsx
├── dataconnect
│   ├── dataconnect.yaml
│   ├── default-connector
│   │   ├── connector.yaml
│   │   ├── mutations.gql
│   │   └── queries.gql
│   └── schema
│       └── schema.gql
├── firebase.json
├── next-env.d.ts
├── next.config.mjs
├── package.json
├── pnpm-lock.yaml
├── postcss.config.mjs
├── public
│   ├── next.svg
│   └── vercel.svg
├── tailwind.config.ts
└── tsconfig.json
Now, we're good to start working with the files inside dataconnect folder.
Let's start editing stuff inside dataconnect/default-connector. Turns out, there's an existing example provided here of some email-app. Let's use this!
There's nothing to edit in the connector.yaml file, but in mutations.gql, and queries.gql simply comment in the sample code!
PS: This is the sample example being used by the Firebase team on their Get Started blog for Data Connect.
Next, comment in the sample code on schema/schema.gql.
Now we're good to deploy the schema to the database.
firebase deploy
This command will get you started on pushing the schema changes o the Database instance on Cloud SQL. You might be asked to review/approve the migrations in the process. You'll see this message if it happens -
⚠ dataconnect: Your new schema is incompatible with the schema of your CloudSQL database. The following SQL statements will migrate your database schema to match your new Data Connect schema.
You'll be shown the SQL statements which are going to be run against your database and given the option to either Execute or Abort. In my case, I could totally watch the world (my DB) burn so I just went ahead with Execute without even reading the changes. But if you're working on something serious, do not do this, else your DB might get executed.
After this step, if you refresh the Data Connect dashboard on Firebase, you'll be able to see the newly created Queries and Mutations visible there, ready to be run from the dashboard itself!
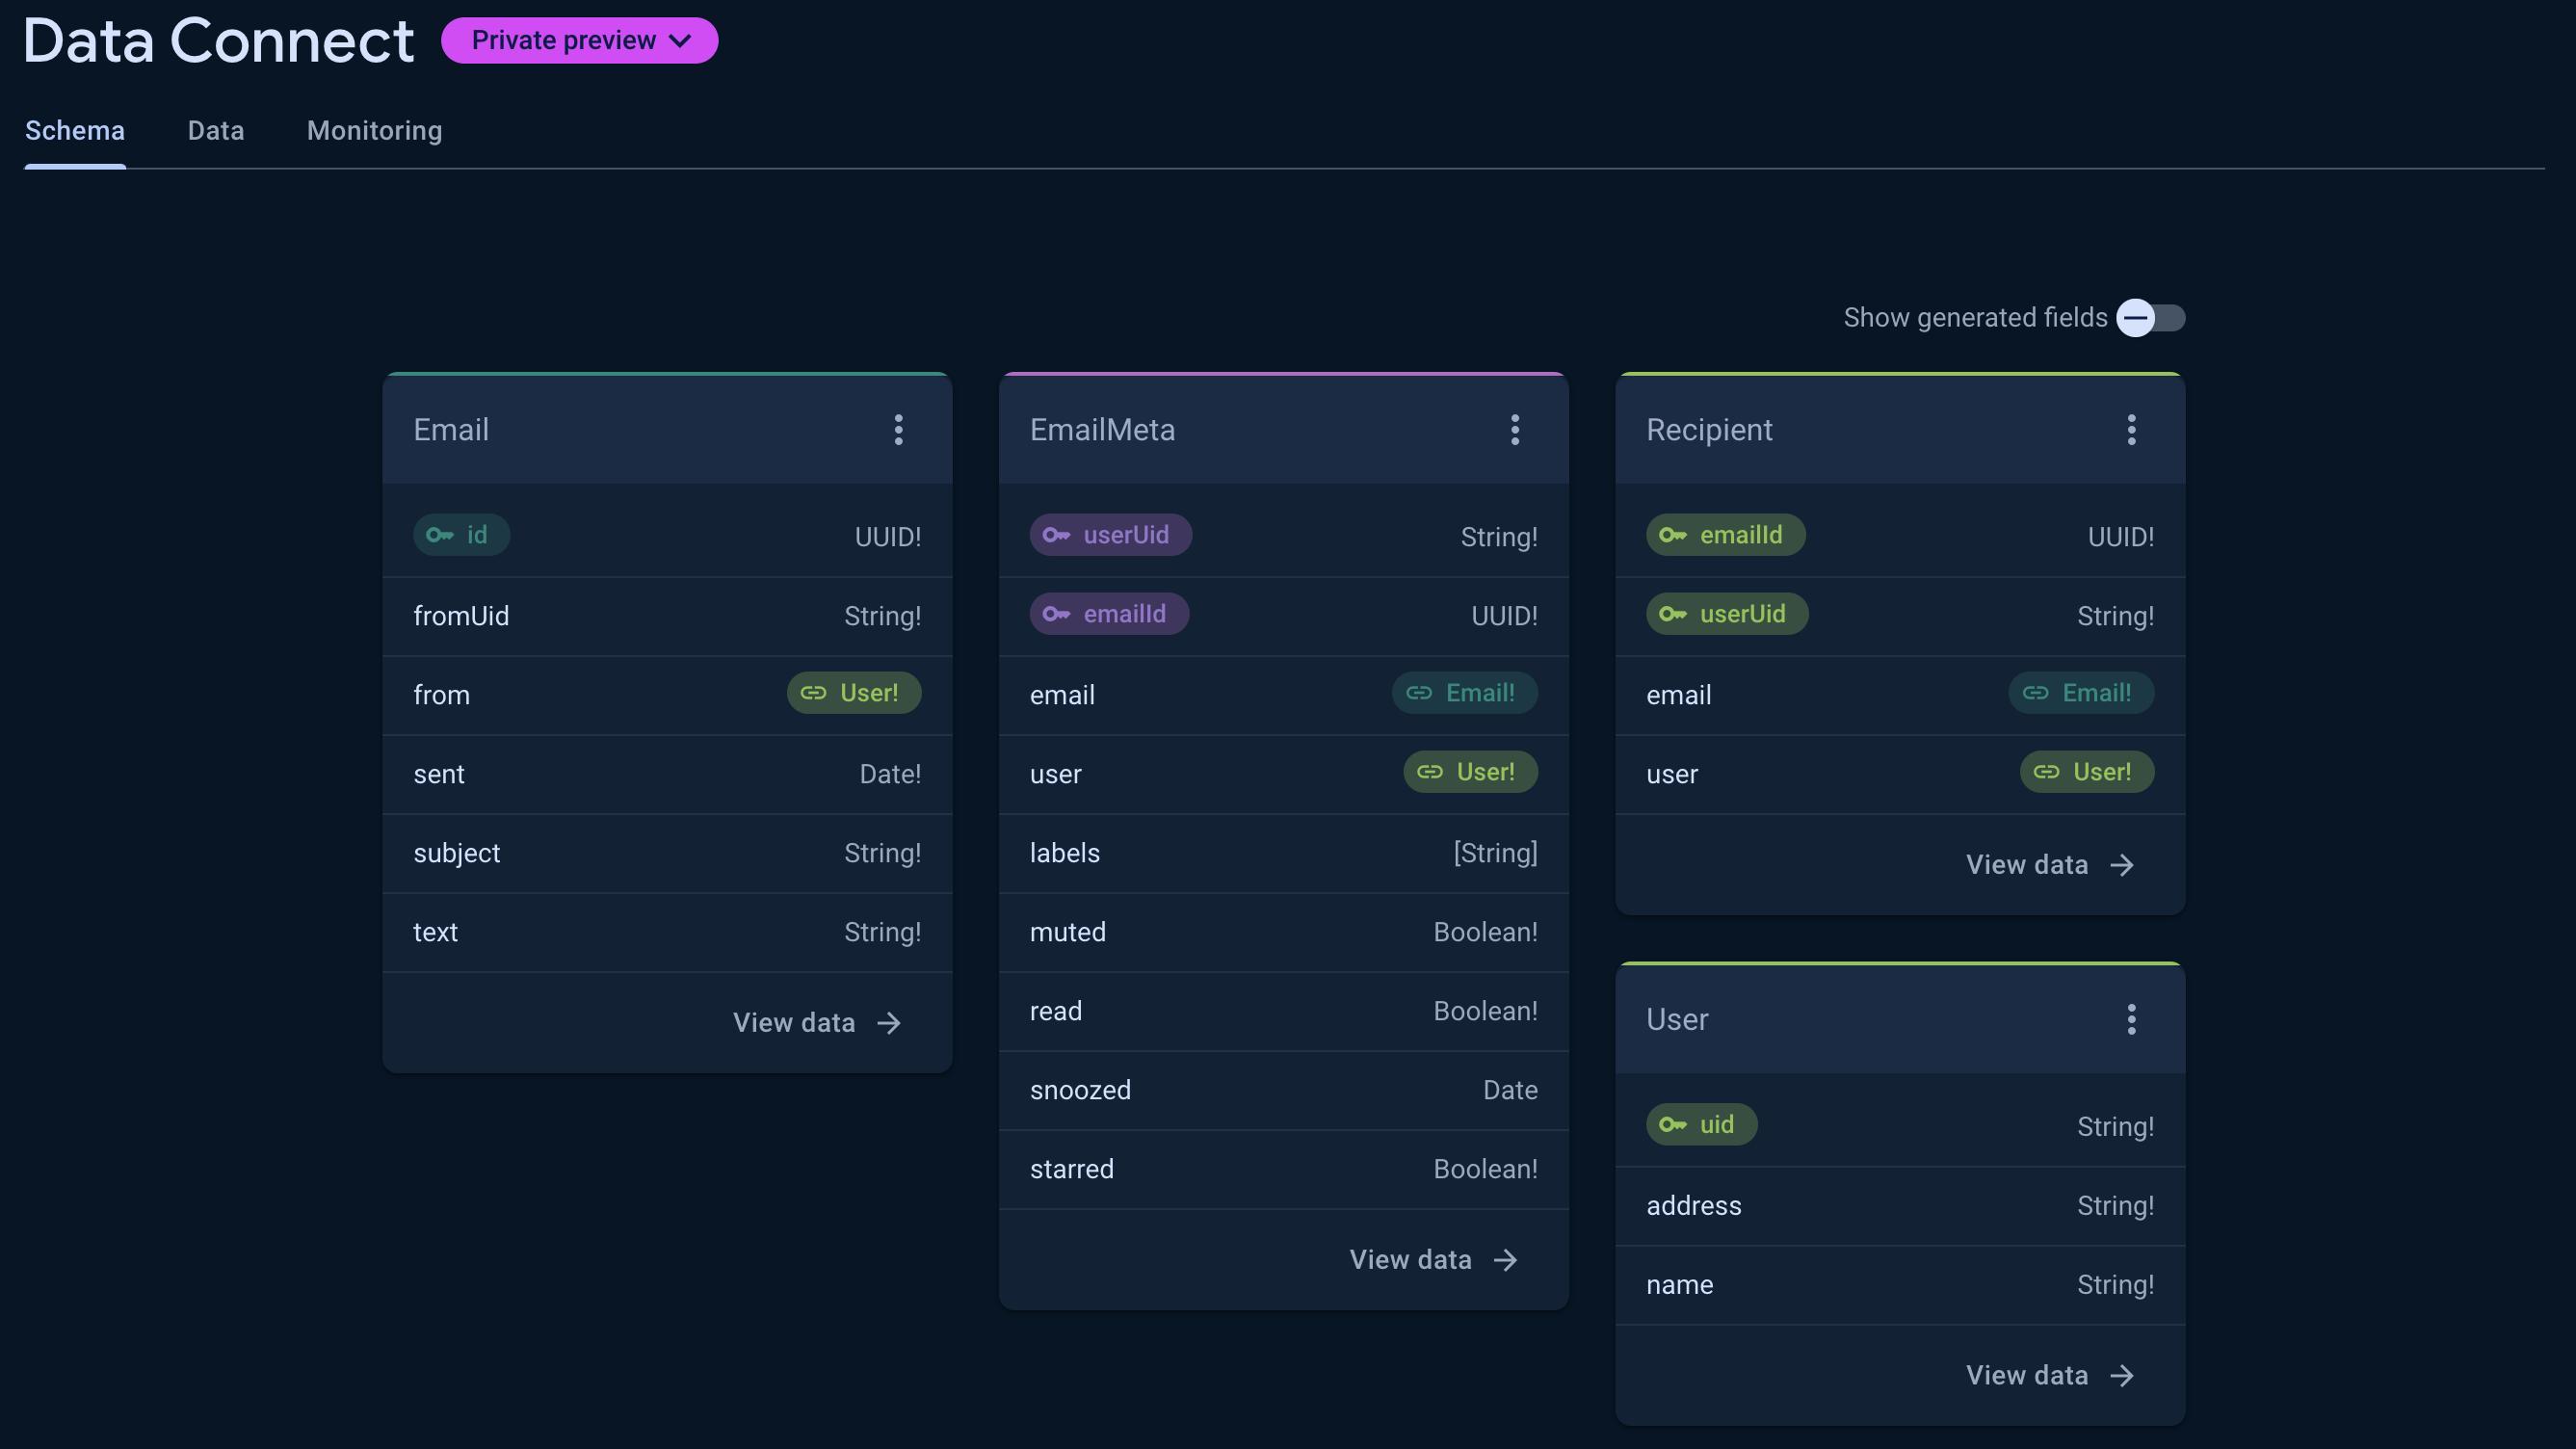 The schema is visible beautifully, neat!
Let me quickly put some data into the DB then, by creating a new user and listing it.
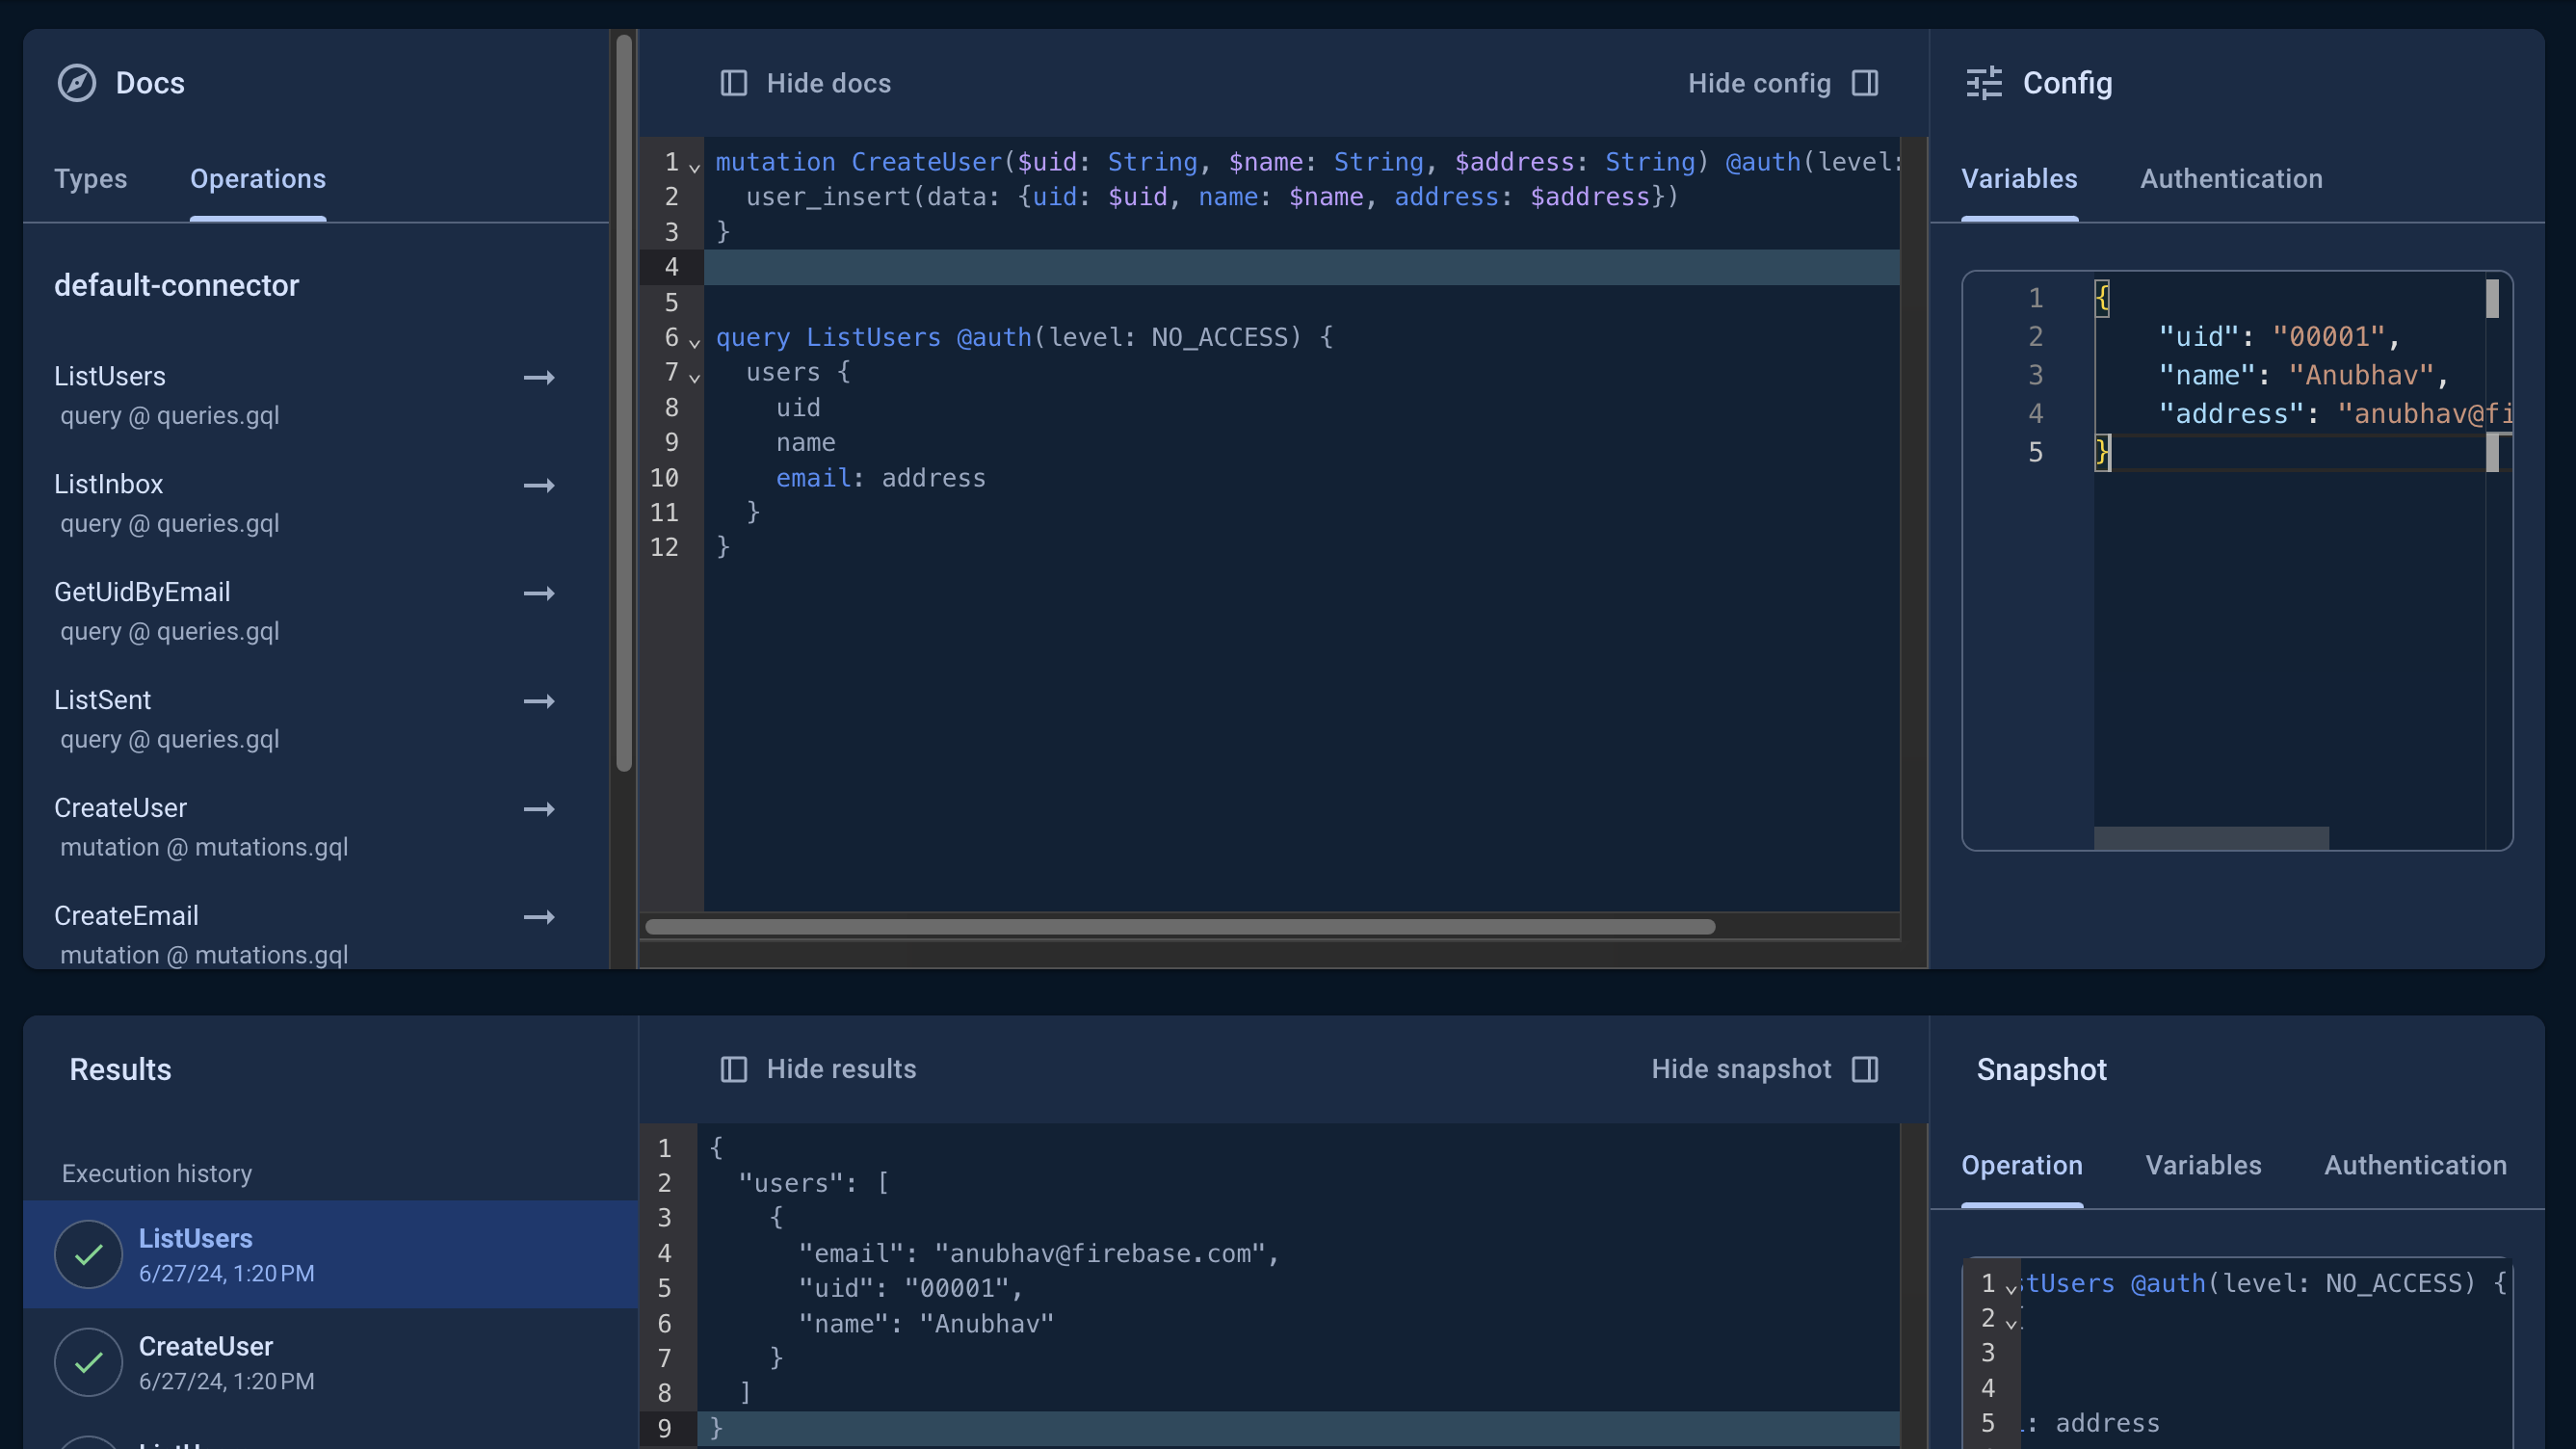 For those of you who have worked with GraphQL before, you'll be very comfortable with this interface because its almost just a Firebase-ified version of the GraphQL Playground.
Connect to Nextjs App
Our exploration fortunately does not stop at being able to add data to the database. It continues to finding out how we can use this database from within the Nextjs code we're writing.
We'll be using the SDK generator provided by Firebase Data Connect folks to create the SDK client. This is in line with other tools like PrismaDB where you need to define a schema and then generate its client.
First, head to dataconnect/default-connector/connector.yaml and update it to match the below configuration:
connectorId: "default-connector"
authMode: "PUBLIC"
generate:
  javascriptSdk:
    # Create a custom package name for your generated SDK
    package: "@dataconnectdemo/email"
    # Tells Data Connect where to store the generated SDK code, this should be in the same
    # directory as your app code
    outputDir: "../../dataconnectdemo-generated"
Now, running the below command should generate the client library you need for accessing this database from code:
firebase dataconnect:sdk:generate
In case this does not work, you might have to install this peerDependency yourself, as shown below:
pnpm add firebase@dataconnect-preview
After this, you'll have to run the following command to link the generated SDK as a dependency:
pnpm link ./dataconnectdemo-generated
And add the following line to your package.json if not present:
  "dependencies": {
	"@dataconnectdemo/email": "file:dataconnectdemo-generated", // <- this line
    "firebase": "10.12.0-dataconnect-preview.388b61c7e",
    "next": "14.2.4",
    "react": "^18",
    "react-dom": "^18"
  },
This done, we'll be able to import the generated Data Connect SDK to our app.
To do this, let's create a new file at app/libs/data-connect.ts to hold our connection with Data Connect. You might be used to naming this firebase.ts , that works as well.
// app/libs/data-connect.ts

import { initializeApp, getApps } from 'firebase/app';
import { getDataConnect } from 'firebase/data-connect'
import { connectorConfig } from '@dataconnectdemo/email'

const firebaseConfig = {
    apiKey: process.env.NEXT_PUBLIC_FIREBASE_API_KEY,
    authDomain: process.env.NEXT_PUBLIC_FIREBASE_AUTH_DOMAIN,
    projectId: process.env.NEXT_PUBLIC_FIREBASE_PROJECT_ID,
    storageBucket: process.env.NEXT_PUBLIC_FIREBASE_STORAGE_BUCKET,
    messagingSenderId: process.env.NEXT_PUBLIC_FIREBASE_MESSAGING_SENDER_ID,
    appId: process.env.NEXT_PUBLIC_FIREBASE_APP_ID
};

export let firebase_app = getApps().length === 0 ? initializeApp(firebaseConfig) : getApps()[0];

export const dataConnect = getDataConnect(firebase_app, connectorConfig)
Needless to say, you'll have to create corresponding entries in your .env file.
This done, let's update our app/page.tsx with the following code:
// app/page.tsx

import { listInbox, ListInboxResponse, listUsers, ListUsersResponse } from '@dataconnectdemo/email'
import  { dataConnect } from "@/app/libs/data-connect";
import Email from './emails';

export default async function Home() {
	const uid = "00001"

	const dc = dataConnect;

	let emails: ListInboxResponse['emails'] = [];
	try {
		const response = await listInbox(dc, { uid });
    const data = response.data;
		emails = data.emails
	} catch(e) {
		console.error("Error: ", e)
	}

	const firstEmail = emails.at(0)!;

	return (
      emails.length > 0 ? (
        <Email
        initialEmails={emails}
        firstEmail={firstEmail}
        uid={uid}
       />
      ) : (
        <>No emails!</>
      )
  );
}
In this, we're merely establishing a connection with Data Connect and fetching the list of emails.
This done, let's define the Email component. I've taken much of this code directly from the started repo which is setup in the IDX environment for Data Connect.
// app/emails.tsx

"use client"; // This is a client component 👈🏽

import { useCallback, useEffect, useState } from "react";
import  { dataConnect } from "@/app/libs/data-connect";
import { deleteEmail, listInbox } from '@dataconnectdemo/email'

interface Props {
	initialEmails: any;
	firstEmail: any;
	uid: string;
}

export default function Email({initialEmails, uid, firstEmail}: Props) {
	const [selectedEmail, setSelectedEmail] = useState(firstEmail); // Default to the first email
	// const [isComposeOpen, setIsComposeOpen] = useState(false);
	const [emails, setEmails] = useState<any>(initialEmails);
	const dc = dataConnect;

    return (
        <main className="col-span-2 border-l flex flex-col">
				{/* Actions */}

				<header className="header-bar justify-end pr-4">
					<button className="button" aria-label="Delete"
            onClick={async () => {
              await deleteEmail(dc, { uid: "user_david", emailId: selectedEmail.id })
              setEmails([...emails.filter((email: { id: any; }) => email.id !== selectedEmail.id)]);
            }}>
						<svg
							xmlns="http://www.w3.org/2000/svg"
							viewBox="0 -960 960 960"
							className="w-5"
						>
							<path d="M280-120q-33 0-56.5-23.5T200-200v-520h-40v-80h200v-40h240v40h200v80h-40v520q0 33-23.5 56.5T680-120H280Zm400-600H280v520h400v-520ZM360-280h80v-360h-80v360Zm160 0h80v-360h-80v360ZM280-720v520-520Z" />
						</svg>
					</button>
				</header>
				{/* Email details */}
				<div className="relative flex flex-col flex-grow p-8 pb-0 overflow-y-auto h-[400px]">
					<div className="flex flex-col border-b pb-4">
						{/* Metadata */}
						<div className="flex items-baseline gap-2 justify-between mb-3">
							{/* Sender */}
							<div className="flex gap-2 items-baseline">
								<span className="font-medium">{selectedEmail.sender.name}</span>
								<span className="text-sm text-gray-700">
									{selectedEmail.sender.email}
								</span>{" "}
							</div>

							{/* Time */}
							<time className="text-sm">{selectedEmail.date}</time>
						</div>

						{/* Subject */}
						<p className="font-medium text-2xl font-display">
							{selectedEmail.subject}
						</p>
					</div>

					<article className="py-4" dangerouslySetInnerHTML={{ __html: selectedEmail.content }} />

				</div>
			</main>
    )
}
This done, with data pre-inserted from the Data Connect Dashboard, we'll be able to see the following output after hitting firebase deploy from the terminal.
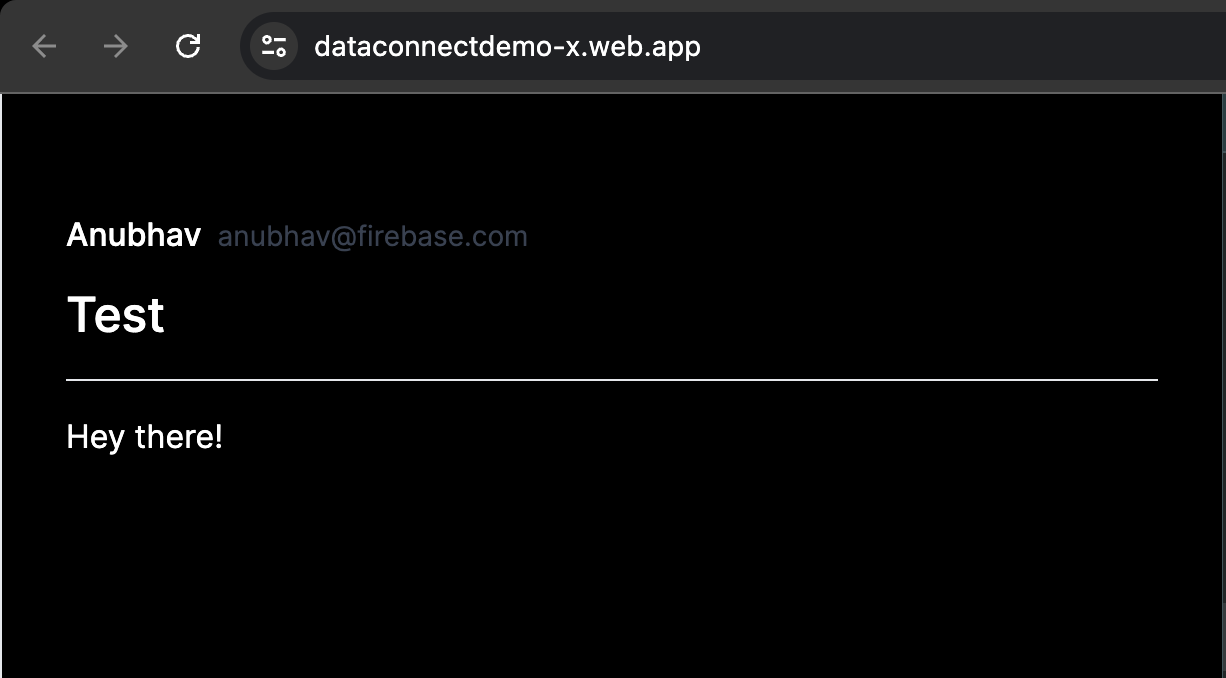 Here's the link to my deployment: https://dataconnectdemo-x.web.app/
Wrap Up
After writing this tutorial and going through Firebase Data Connect setup and usage, I see the amazing potential this product has for the future of Firebase. At the same time, things are still a bit frictional, as is to be expected while its in Private Preview. I believe it will eventually become magically fitting like all the other Firebase features that have matured immensely over the years.
Finally, remember that I took the unconventional route for this tutorial by not using any of the recommended methods by the team. There are chances it might stop working at any point, which is when you need to start putting error message comments below!